Chicken Feeder Pot Project
Yesterday I finally got my chicken feeder planters made. Here are the instructions:
1. Come from a family that keeps everything. My dad had these at the big rock (dump site) on our farm. These planters were actually his idea. Way to be Martha-esque dad.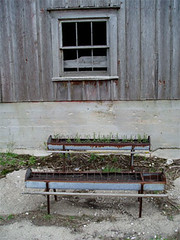
2. Using what ever size (or type) drill bit you can find in the messy pit that has become your tool room (someday it will be a bathroom) drill holes how ever far apart you feel like for drainage.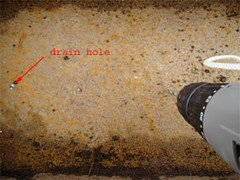
3. Using a wire brush go over the interior surface to remove any loose dirt or rust from the surface. Or don't and call the painted over dirt antiquing.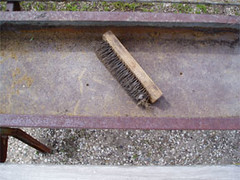
4. Remove the wood the chickens used to stand on to eat. Use a hack saw if necessary. Or waste most of a perfectly good afternoon looking for a Dremel attachment you mis-placed in the pit of a tool room only to return home empty handed. Be thankful you have hack saw blades.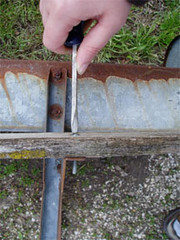
5. Use rubberized underbody coating to help protect these "antiques" that just spent the last 30 years in the crevice of a huge rock.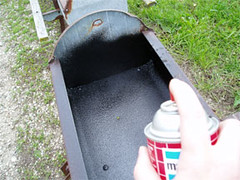
6. Spray paint color of choice. Tim choose a textured gray. The picture on the front of the can showed a beautiful old fashioned street light that had been "painted" with this paint. I think he's trying to make my chicken feeders into something they're not (he tries this with me occasionally, but that's a whole different post).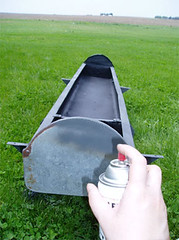
7. Once the underbody coating has dried put a little gravel in the bottom and then some sand for good drainage (I'm kinda a stickler for that drainage thing ain't I). Then top off with wholesome Iowa dirt (or a dirt of your choice). And plant the flower of your choosing. I went with geraniums because these planters sit back so far I wanted something with a little height.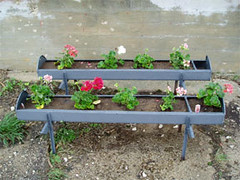
I still need to get the guards put back on and the boards painted and screwed back on.
![]()
2 comments:
Those look awesome! Funny tutorial, too. I'm discovering you are a very clever lady. :)
best regards, nice info Honda battery ytz14s condominium notification requirements fire alarm early ovulation on clomid free movie cartoon porn stockton dental insurance free email phone fax threesome sex wife mfm computer professionals growth over the next decade ringtones nextel Business owner autobile insurance Cpu temperature check Government fax numbers Chrysler town and country recalls flat screen teleevisions Teens nude amateurs Leadership training sales Agenda for conference calls on fasd H3 hummer suv Simple forex trading system Popup blocker golf components
Post a Comment